How PerfProperty Works: From Phone Photo to Listing-Ready Image
See how to upload property photos, enhance them, request precise changes, review each result, and download an approved listing gallery.
PerfProperty gives hosts a focused way to turn ordinary property photos into polished listing images without learning a professional editing tool. The workflow is straightforward: upload, enhance, request any specific changes, review, approve, and download.
The goal is not to invent a different property. It is to present the real space more clearly while keeping the layout, views, furnishings, condition, and amenities accurate. Here is the full process.
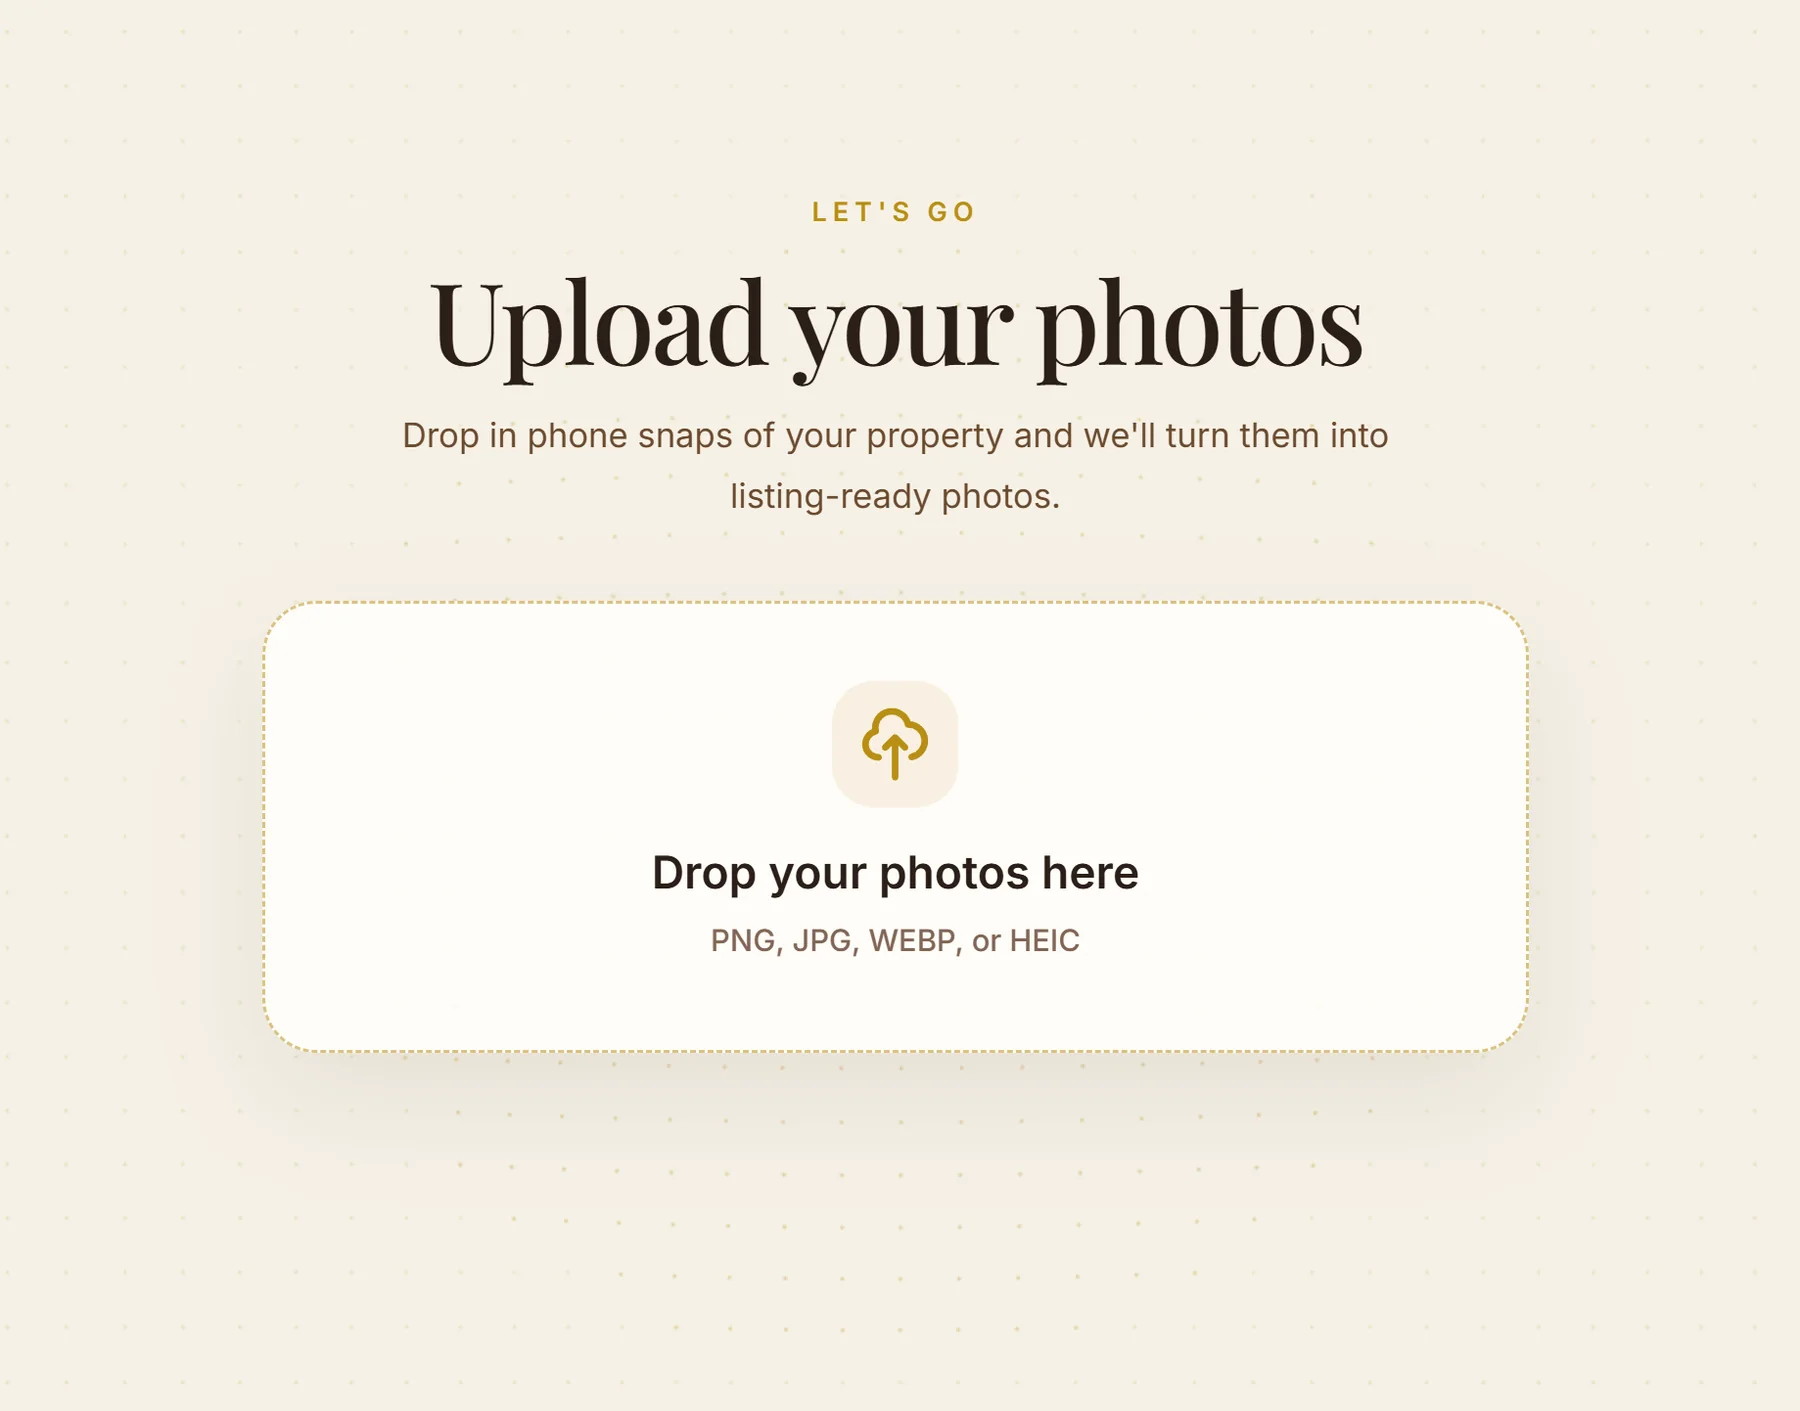
1. Upload your property photos
Start by dropping in the photos you want to improve. PerfProperty accepts common phone-photo formats including PNG, JPG, WEBP, and HEIC. You can begin with one important image, such as the cover photo, or add a group of rooms and amenities to work through as a set.
Choose photos that already show the real space clearly. Enhancement can help with issues such as dim lighting, dull color, or an inconsistent gallery, but a useful starting angle still matters.
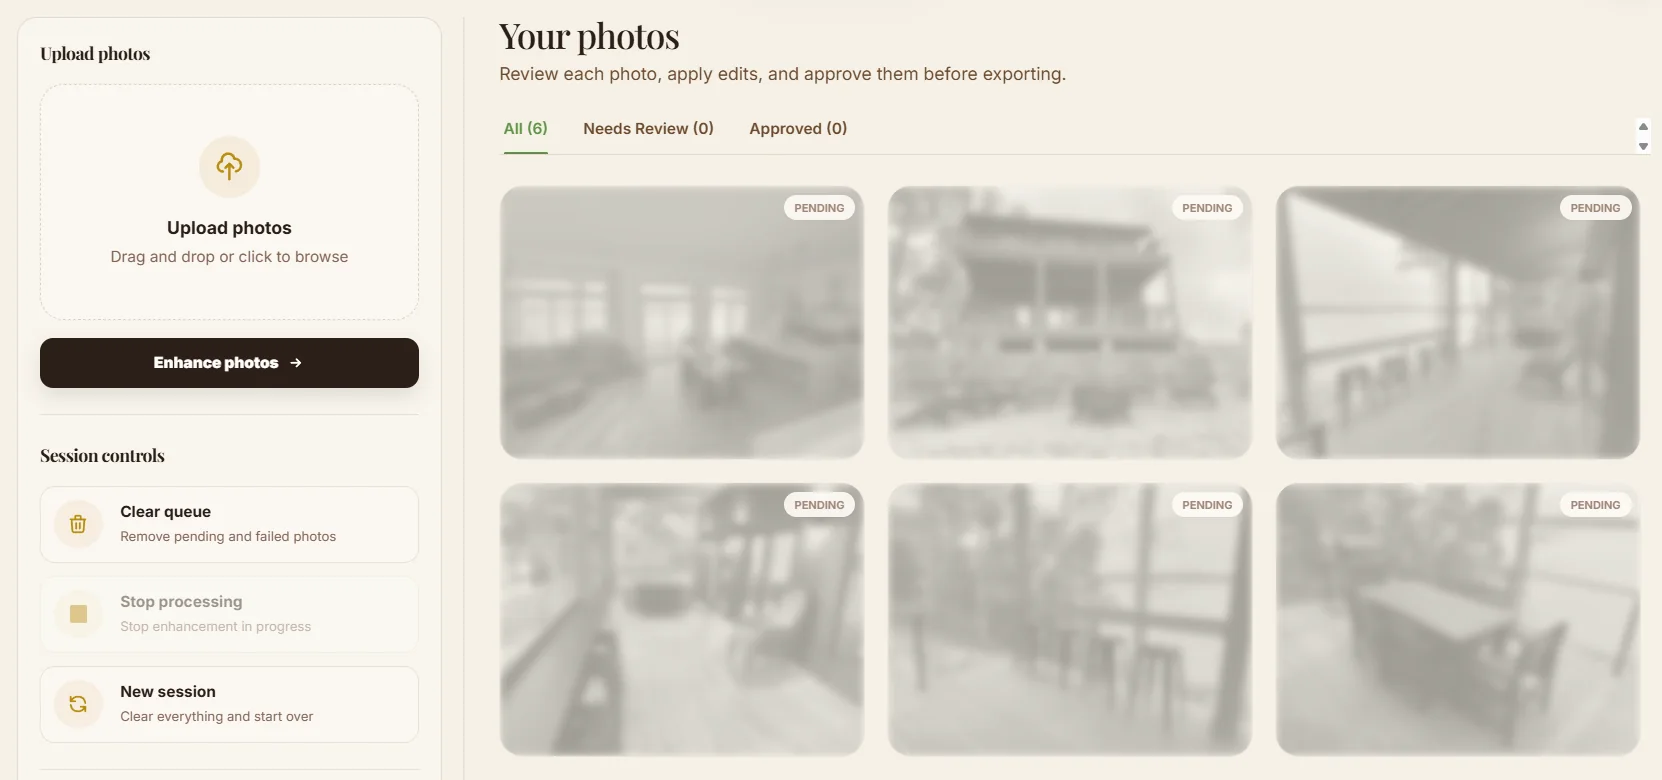
2. Review the queue and start enhancement
After upload, your photos appear together in the workspace. This gives you a quick check that the right rooms, exterior angles, views, and amenities are included before processing begins.
Select Enhance photos when the queue is ready. PerfProperty processes multiple images while keeping each one available for individual review. You do not have to learn layers, masks, or technical editing controls.
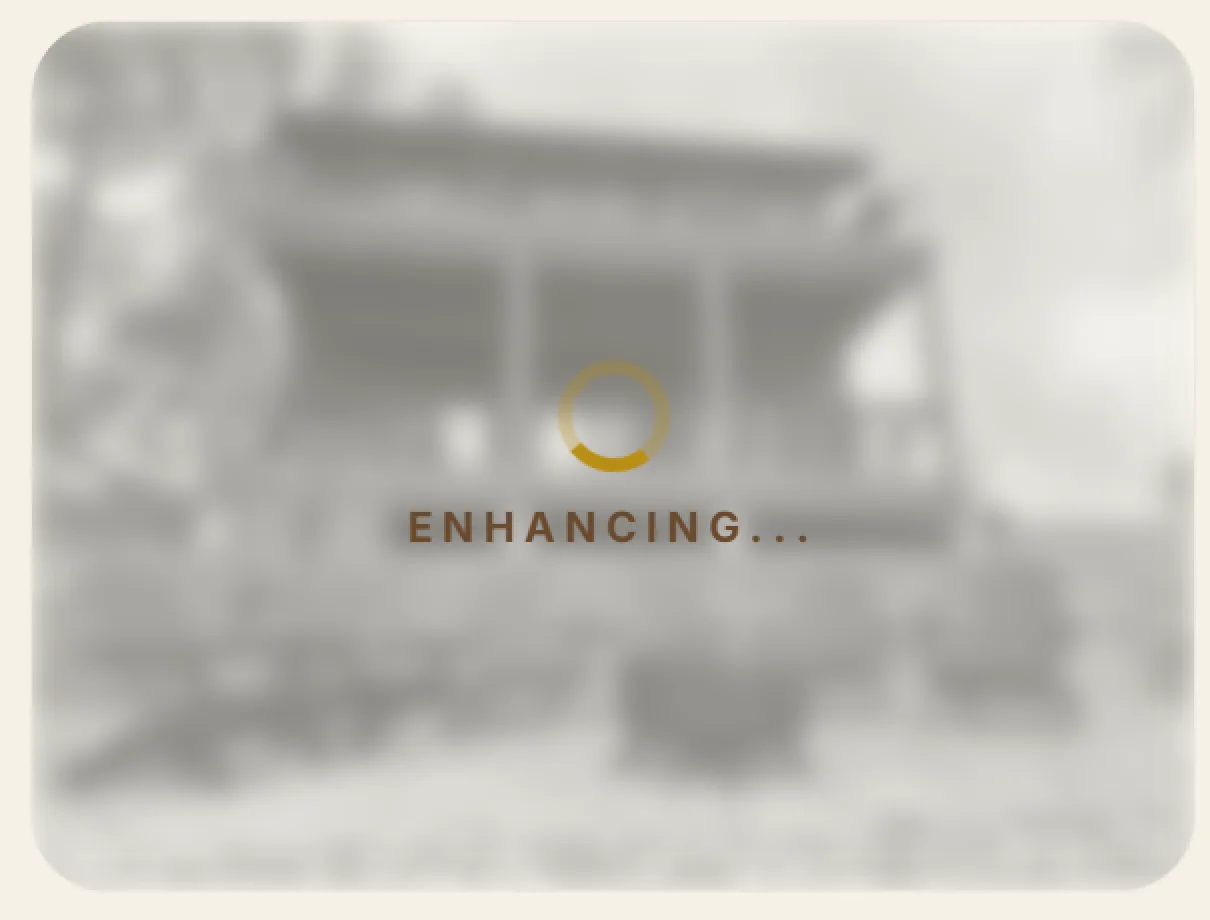
3. Let each photo process
An enhancing indicator appears on a photo while its new version is being prepared. You can leave the detailed image decisions until the result is ready rather than adjusting a long list of settings beforehand.
The first enhancement is a starting point, not an automatic final answer. Generated results can be imperfect, so every photo should be checked before it is approved or added to a public listing.
4. Compare the result with the real property
Open the finished image and compare it with the original. Look for practical improvements: a brighter room, more balanced color, clearer detail, and a cleaner overall presentation.
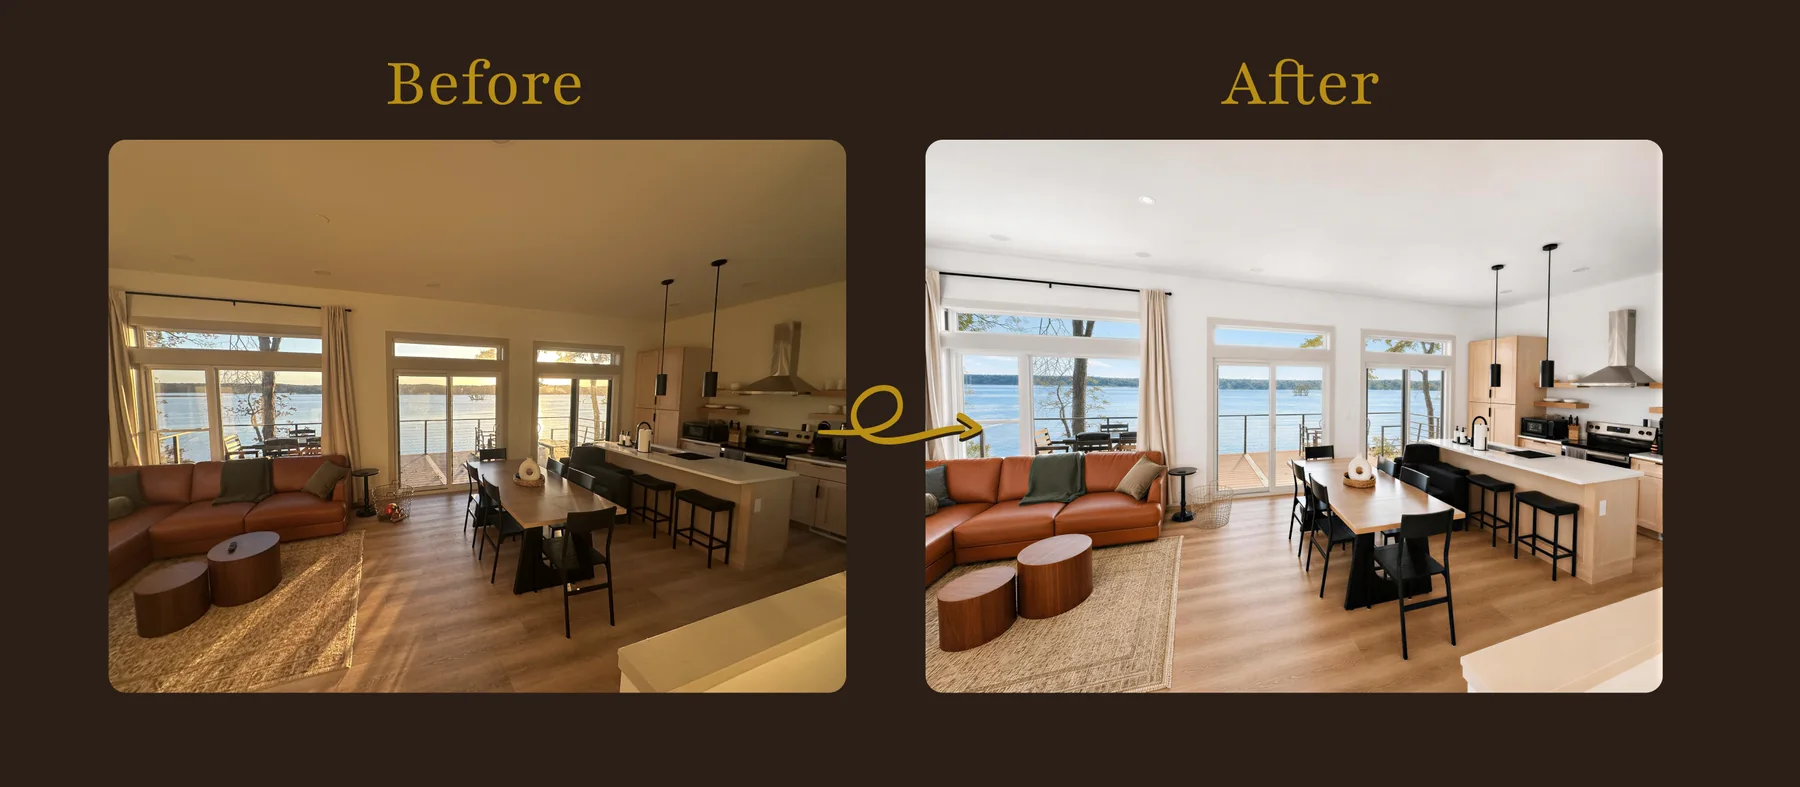
At the same time, confirm that the photo still represents what a guest will experience. Check the room size, windows and view, furniture, fixtures, surfaces, layout, and amenities. A polished image builds confidence only when it remains honest.
5. Click the exact area you want to change
If one part of the image still needs attention, click directly on that location and add a short note. This turns a visual point into a specific request, so you can describe the correction in everyday language.
For example, a visible cord can distract from an otherwise clean living-room photo. Click near the cord and write a focused note such as “Hide this cord.”
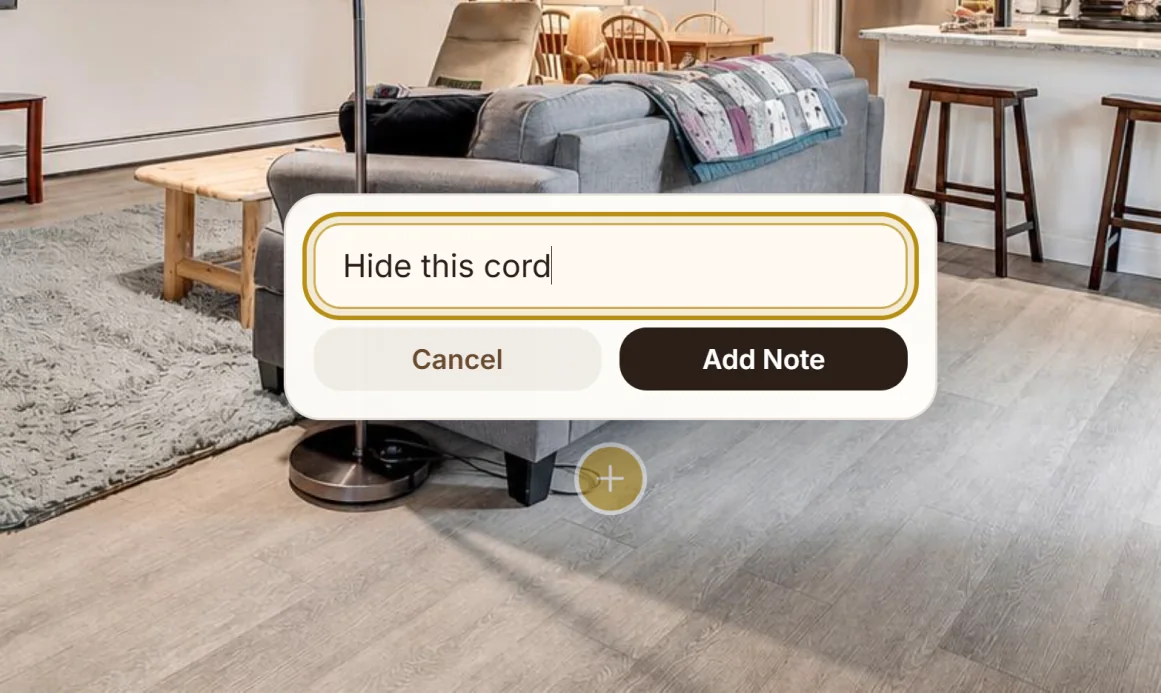
Keep requests truthful and limited to presentation problems. Temporary clutter or a small distraction may be appropriate to remove. A material defect, defining feature, or real amenity should not be hidden or changed in a way that creates false expectations.
6. Add another precise note when needed
The same point-and-describe workflow works for small objects elsewhere in the frame. In this example, the note targets a remote sitting on the coffee table rather than asking the system to reinterpret the whole room.
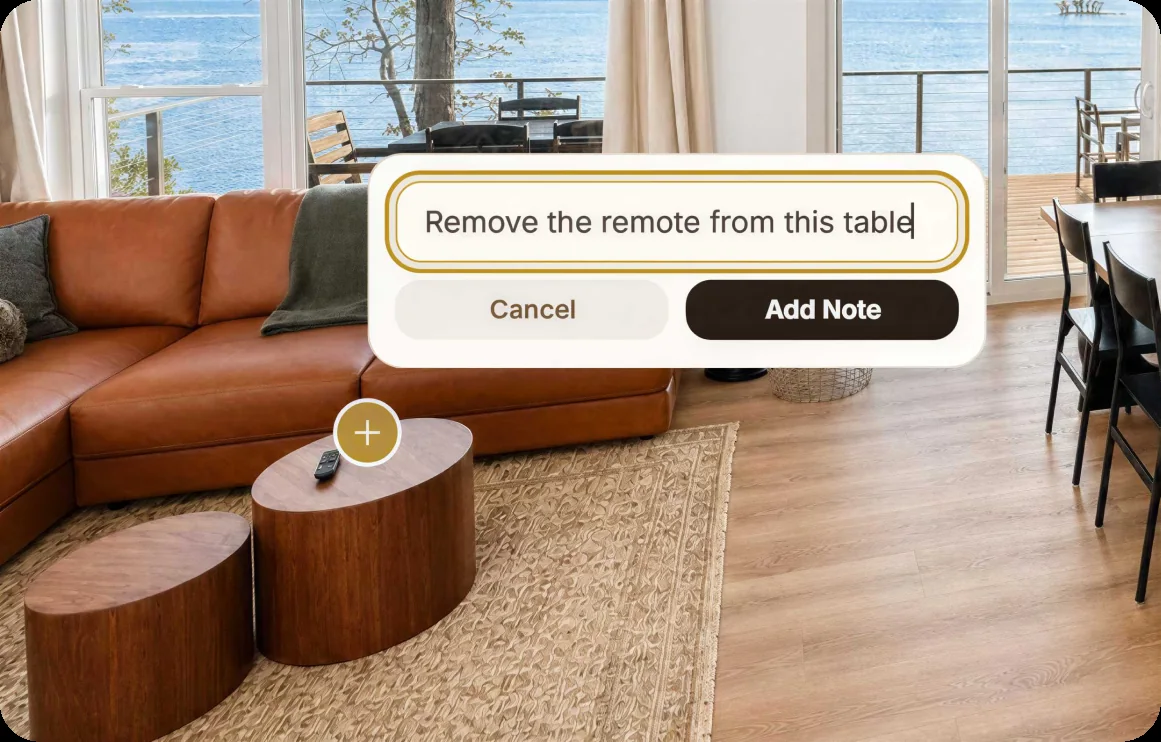
Specific notes are usually easier to review than broad instructions. Describe the object or area, state the change plainly, and then inspect the new version. You remain responsible for deciding whether the result is accurate enough to use.
7. Approve the versions that pass review
Work through the gallery one photo at a time. Approve only the versions that look polished and still match the property. The workspace separates photos that need review from those already approved, making it easier to see what remains unfinished.
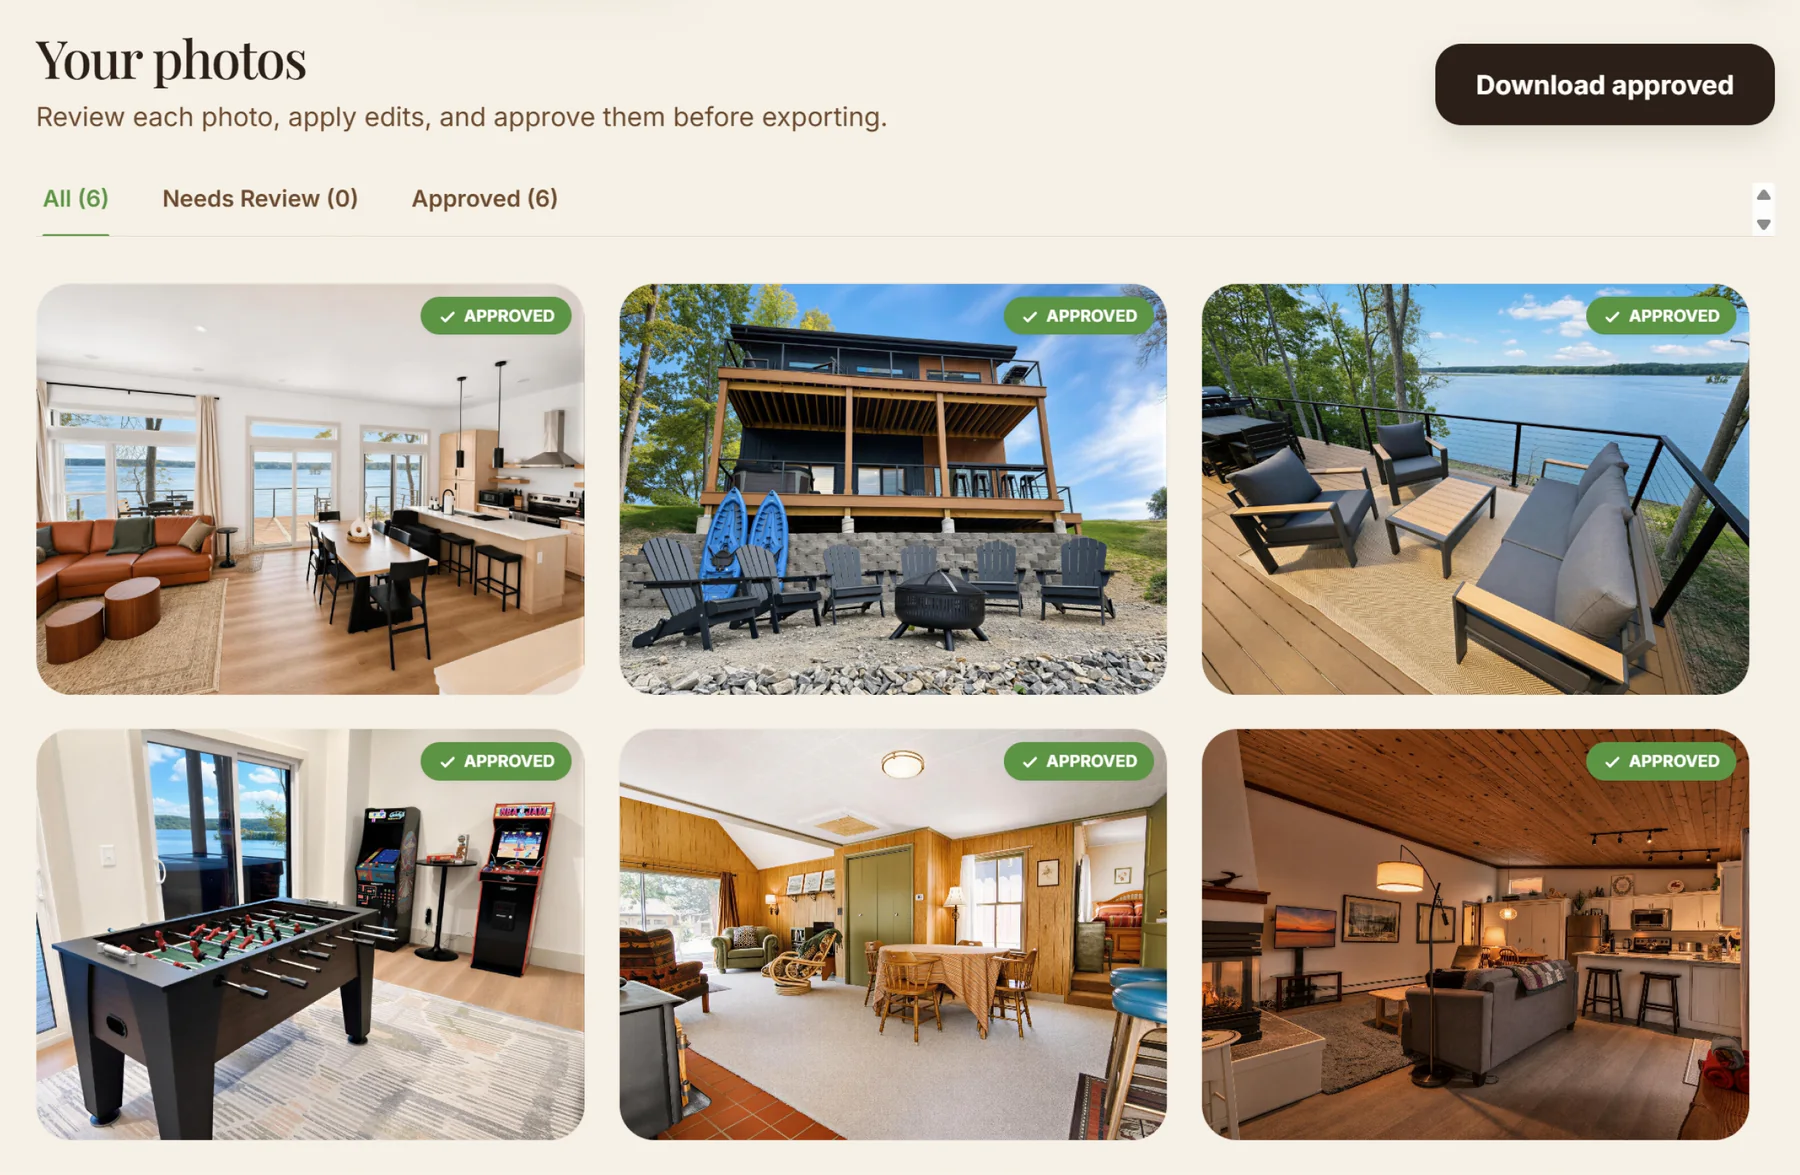
This approval step is what makes an image listing-ready. It is the host's confirmation that the finished photo communicates the space clearly without materially changing it.
8. Download your approved gallery
Once the set is approved, use Download approved to export the finished images together. The result is a practical folder of reviewed photos ready for your listing workflow, whether you are refreshing a cover image or replacing a full gallery.
The shortest version of the process is simple:
- Upload the real property photos.
- Enhance the queue.
- Review each result against the original space.
- Click and describe any precise correction.
- Approve only accurate final versions.
- Download the approved gallery.
You can try one property photo without signing up and see the workflow on an image you already know well.