How to Make Short-Term Rental Photos Look Bright, Clear, and Listing-Ready
A practical guide for improving short-term rental photos without hiring a photographer, while keeping the real property recognizable.
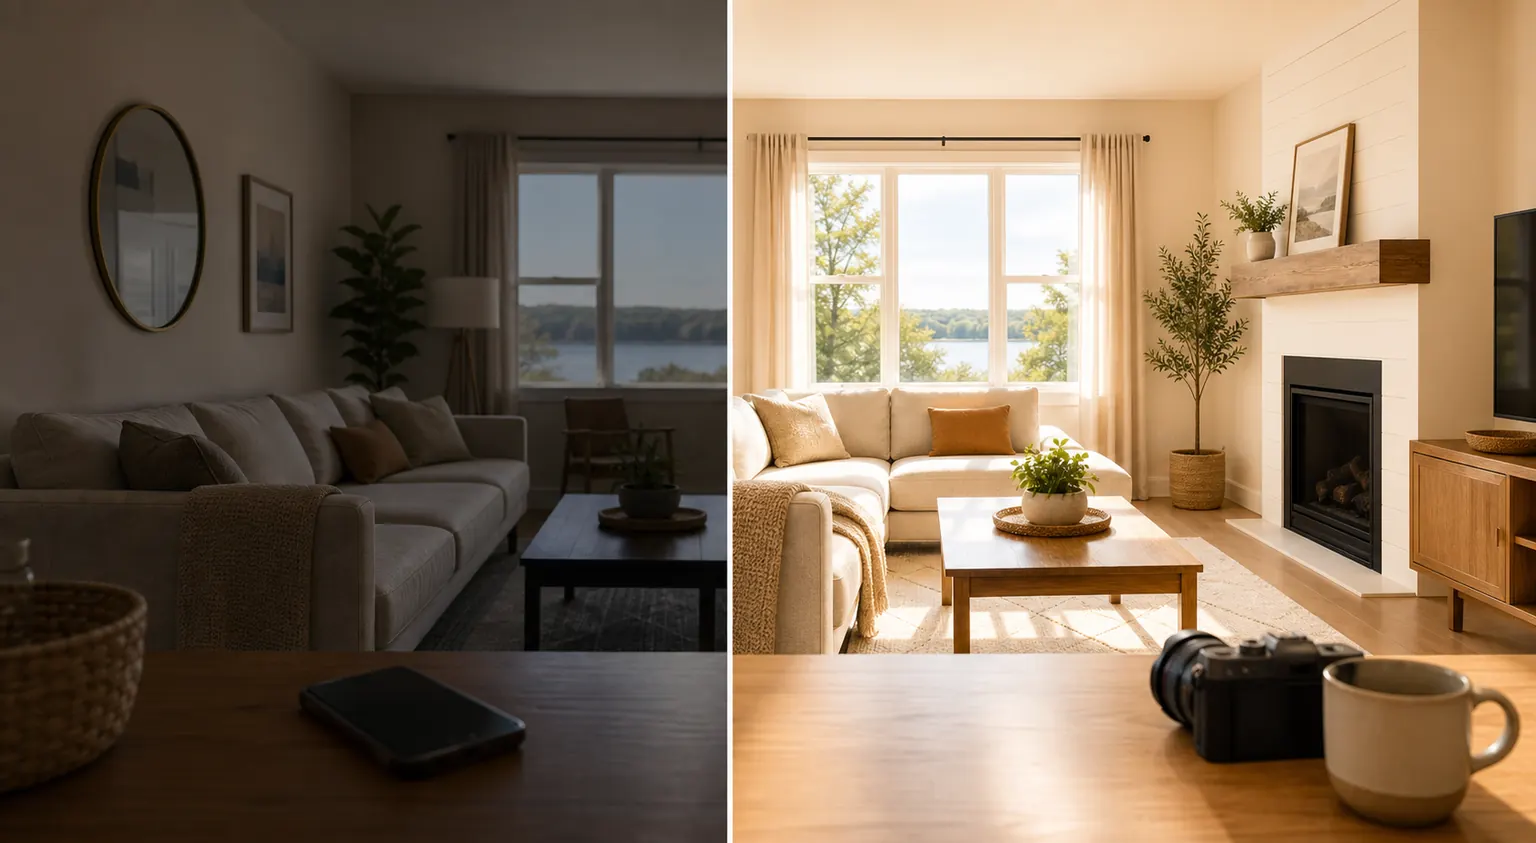
A short-term rental can look good in person and still photograph badly.
The room may feel sunny, but the phone photo comes out dim. The bedding may be clean, but the image looks flat. A kitchen may be ready for guests, but mixed lighting, crooked lines, and a few objects on the counter can make the whole space feel less cared for than it really is.
That frustration shows up often in host discussions: people know photos matter, but hiring a photographer is not always practical for every new room, seasonal refresh, furniture swap, or early listing test. The practical question is not "How do I fake a professional shoot?" It is "How do I make the real space easier to see?"
PerfProperty is built for that middle ground. You upload the real property photo, enhance the presentation, request precise changes if one area still needs work, review the result, and download only the version you approve.
Why good rooms still look weak on camera
Most host-taken photos run into a few predictable problems:
- the room looks darker on camera than it feels in person;
- windows turn bright white while the interior stays shadowy;
- warm lamps and cool daylight fight each other;
- walls, doors, and cabinets lean because of the camera angle;
- small distractions pull attention away from the room;
- colors look yellow, gray, or inconsistent across the gallery.
None of these automatically mean the property needs a redesign or a full professional shoot. Often, the photo needs cleaner presentation: better exposure, more natural color, straighter lines, and less visual noise.
The important boundary is accuracy. A brighter photo should still show the same walls, furniture, floor, view, layout, condition, and amenities a guest will experience.
Start with photos worth improving
Enhancement works best when the original photo already tells the truth about the space.
Good candidates usually show a clear room or amenity, have enough detail to work with, and use an angle that helps a guest understand the space. A dark living room can be improved. A slightly yellow bedroom can be balanced. A patio photo with dull color can often be made clearer.
Photos are harder to rescue when they hide the layout, blur important details, cut off the main feature, or use an angle that makes the room misleading. If the starting photo does not show the property fairly, enhancement cannot turn it into a trustworthy listing asset.
What "bright and clear" should mean
For listing photos, brighter does not mean artificial.
A useful enhancement might lift shadows in a living room, make white bedding look clean instead of gray, balance yellow lamp light with daylight, straighten door frames, or reduce a distracting color cast.
It should not add amenities, hide material defects, change the view, make a room appear materially larger, or replace defining furnishings. Those edits may make a photo look more dramatic, but they can create expectations the stay cannot meet.
The better goal is simple: make the real space look bright, clear, and ready to evaluate.
How PerfProperty solves this workflow
PerfProperty keeps the process focused on the jobs hosts actually need to do.
First, upload one photo or a group of property photos. You do not need to choose editing settings or learn a design tool before seeing a useful first version.
Next, run enhancement. PerfProperty improves presentation problems such as dim lighting, dull color, and inconsistent clarity while keeping the photo tied to the original property.
Then review the result. This step matters because you know the space. Look closely at room size, surfaces, furniture, windows, views, and amenities. If the image looks polished and still accurate, it may be ready to approve.
If one part still needs attention, use a targeted edit instead of starting over. Click the specific area and describe the change in plain language.
Good targeted requests sound like:
- "Brighten the seating area while keeping the window natural."
- "Reduce the yellow cast from this lamp."
- "Make the bedding look cleaner without changing the room."
- "Straighten the vertical lines around this doorway."
- "Reduce glare on the cabinet fronts."
Those requests are specific enough to review. They improve the presentation without asking the system to invent a different property.
Work room by room
If you are refreshing a gallery, start with the images guests use to make quick decisions.
For a living room, look for brightness, straight lines, clear seating, and natural color. This is often where guests judge the overall feel of the stay.
For a bedroom, focus on clean bedding, visible floor space, accurate window light, and a calm color balance. Do not edit the room into looking larger or more furnished than it is.
For a kitchen, watch mixed lighting and countertop clutter. Small temporary distractions can be cleaned up, but appliances, finishes, and wear should remain honest.
For a bathroom, clarity matters more than drama. Guests want to understand fixtures, cleanliness, layout, and condition. Avoid edits that hide material issues.
For outdoor spaces, improve color and visibility without changing views, boundaries, furniture, weather-dependent features, or amenities.
A quick approval checklist
Before downloading a finished image, ask:
- Does this still look like the same room?
- Are the layout, view, furniture, and amenities accurate?
- Did the edit fix a photo problem rather than a property reality?
- Would a guest feel the photo was fair after arriving?
- Does the image now fit better with the rest of the gallery?
That approval step is what makes the result listing-ready. PerfProperty can help create a stronger version, but the host decides whether the final image is accurate enough to use.
The practical path
You do not need to edit the whole gallery at once.
Start with one important image: a cover photo, primary bedroom, living room, kitchen, or strongest amenity. Upload it, enhance it, compare the result with the original, add a targeted note if needed, and download the approved version.
Then repeat for the next photo.
That is the advantage of a listing-photo workflow over a general editing tool. The job is not to become a photographer. The job is to make the real property easier to see, easier to trust, and easier to present clearly.
You can try one property photo without signing up and review the before-and-after result yourself.